Photonicat 自动关机电压修改:修订间差异
跳转到导航
跳转到搜索
无编辑摘要 |
无编辑摘要 |
||
| 第18行: | 第18行: | ||
*此修改仅影响显示%,不影响实际使用体验。和关机逻辑,充电曲线有待测试完再修改。 | *此修改仅影响显示%,不影响实际使用体验。和关机逻辑,充电曲线有待测试完再修改。 | ||
==修改后参考== | |||
<pre> | <pre> | ||
[Hardware] | [Hardware] | ||
2023年1月31日 (二) 14:48的版本
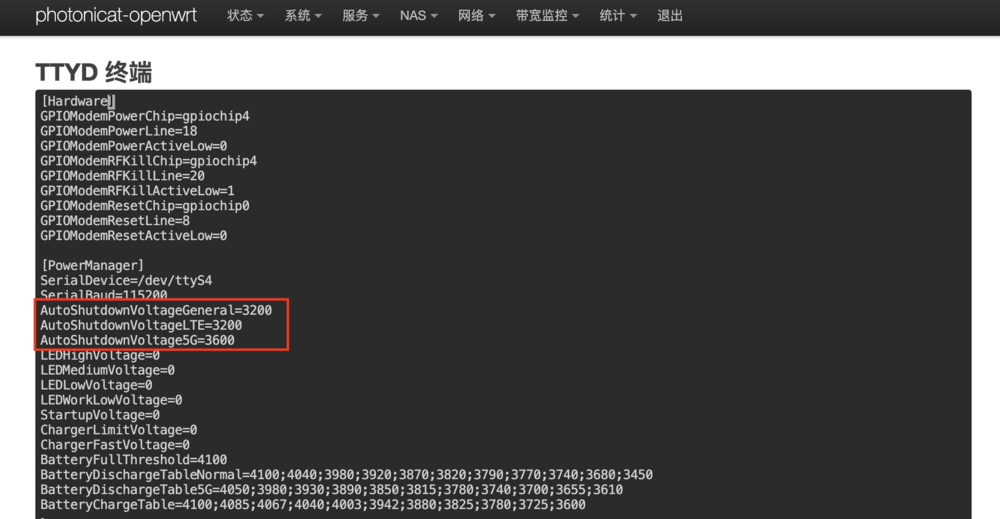
光影猫采取电池直接驱动4G/5G模块,针对RM500U 模块,若电压低于3600mV(3.6v)一分钟以上。 光影猫为了系统稳定性,会自动执行安全关机。然而如果是其他模块,可能关机电压可以更低。通过修改 /etc/pcat-manager.conf 适用于:2023年1月以及之前的版本。 nano 或 vim 编辑器,例如:nano /etc/pcat-manager.conf 修改保存后重启。 不要修改其他参数。
关机电压调整
- EM05 -> 针对 AutoShutdownVoltageLTE=3250
- RM500U -> 针对 AutoShutdownVoltage5G=3600
- RM500Q -> 针对AutoShutdownVoltageGeneral=3250
- RM520N -> 针对AutoShutdownVoltageGeneral=3250
注意过低电压可能会导致不安全关机,文件或文件系统受损!!! 如果文件系统造成损坏,需要重新刷机。
修改放电曲线调整
- 3.25v 关机电池放电曲线调整:
BatteryDischargeTableNormal=4100;3960;3890;3820;3760;3700;3660;3630;3590;3520;3300 - 每10%一个间隔,电压落在区间此中间为线性估算。
- 此修改仅影响显示%,不影响实际使用体验。和关机逻辑,充电曲线有待测试完再修改。
修改后参考
[Hardware]
GPIOModemPowerChip=gpiochip4
GPIOModemPowerLine=18
GPIOModemPowerActiveLow=0
GPIOModemRFKillChip=gpiochip4
GPIOModemRFKillLine=20
GPIOModemRFKillActiveLow=1
GPIOModemResetChip=gpiochip0
GPIOModemResetLine=8
GPIOModemResetActiveLow=0

[PowerManager]
SerialDevice=/dev/ttyS4
SerialBaud=115200
AutoShutdownVoltageGeneral=3250
AutoShutdownVoltageLTE=3250
AutoShutdownVoltage5G=3600
LEDHighVoltage=0
LEDMediumVoltage=0
LEDLowVoltage=0
LEDWorkLowVoltage=0
StartupVoltage=0
ChargerLimitVoltage=0
ChargerFastVoltage=0
BatteryFullThreshold=4100
_BatteryDischargeTableNormal=4100;4040;3980;3920;3870;3820;3790;3770;3740;3680;3450
BatteryDischargeTableNormal=4100;3960;3890;3820;3760;3700;3660;3630;3590;3520;3300
BatteryDischargeTable5G=4050;3980;3930;3890;3850;3815;3780;3740;3700;3655;3610
BatteryChargeTable=4100;4085;4067;4040;4003;3942;3880;3825;3780;3725;3600
_CHANGE_ME_BatteryChargeTable=4100;4085;4067;4040;4003;3942;3880;3825;3780;3725;3600
